Most electrical accidents at home happen not during complex repairs, but in the most routine moments — and knowing how to change a light bulb safely is one of those small pieces of knowledge that genuinely matters. It sounds almost too simple to warrant attention, yet a wrong move with a live socket or an unstable ladder sends thousands of people to emergency rooms every year. This guide walks you through the entire process the right way, so you can handle it with confidence and zero drama.
Before You Touch Anything: The Power Question
The single most important step happens before your hand gets anywhere near the fixture. Switch off the light using the wall switch, then go one step further and turn off the circuit breaker that controls that particular room or fixture. This eliminates any risk of an unexpected power surge or accidental switching by someone else in the house while you are working.
Give the old bulb at least ten minutes to cool down, especially if it is a halogen or incandescent type. These bulbs operate at very high temperatures and can cause serious burns even after they appear to have gone out. LED bulbs run much cooler, but patience is still a good habit to develop.
Never assume the power is off just because the switch is in the “off” position. Faulty wiring, miswired switches, or a second switch on a two-way circuit can leave the socket live even when the room appears dark.
Choosing the Right Replacement Bulb
Grabbing any bulb from the drawer and screwing it in is a common mistake that leads to flickering lights, overheated fixtures, or even fire hazards. Before purchasing a replacement, check three things on the original bulb or inside the fixture itself:
- Base type — the most common are E27 (standard screw), E14 (small screw), and GU10 (twist-and-lock bayonet used in downlights)
- Wattage rating — never exceed the maximum wattage printed inside the fixture housing
- Voltage — most household fixtures run on 120V or 230V depending on your country; always match this
If you are replacing an older incandescent or halogen bulb with an LED equivalent, pay attention to lumens rather than watts. An LED rated at 800 lumens produces roughly the same brightness as a 60-watt incandescent while using only around 8–10 watts. This is worth understanding because the wattage numbers are no longer directly comparable across bulb types.
| Old Bulb (Incandescent) | LED Equivalent Wattage | Approx. Lumens |
|---|---|---|
| 40W | 4–6W | 450 lm |
| 60W | 8–10W | 800 lm |
| 75W | 11–13W | 1100 lm |
| 100W | 14–18W | 1600 lm |
Working at Height Without Taking Risks
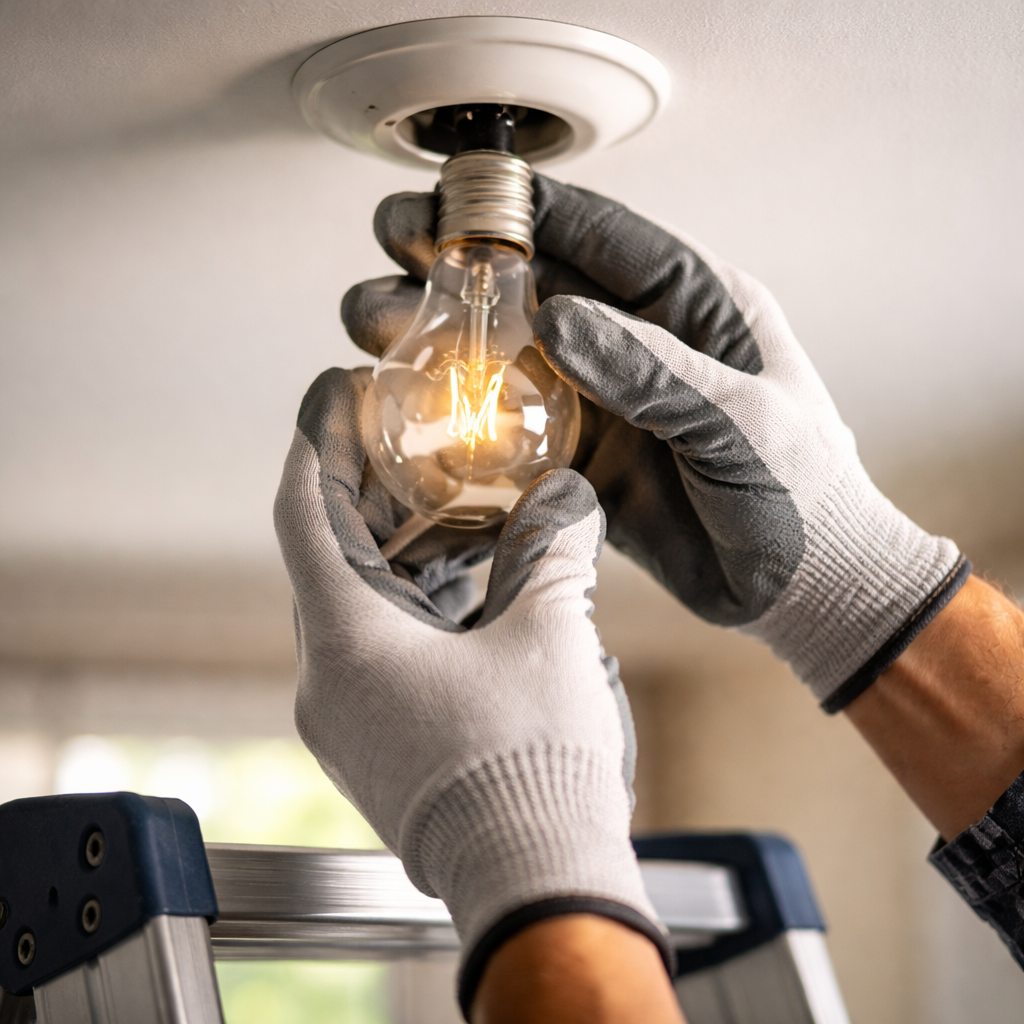
Ceiling fixtures require reaching up, and this is where many injuries occur — not from electricity, but from falls. A sturdy step ladder is the only acceptable tool here. Standing on a chair, a stack of books, or the edge of a bathtub might seem quick and convenient, but these surfaces are unstable and unpredictable.
Position the ladder on a flat, dry surface directly below the fixture. If you are working alone, make sure someone else is at home and aware of what you are doing. Dry hands are essential not just for electrical safety but also for maintaining your grip on the ladder and the bulb itself.
The Removal and Installation Process Step by Step
With power off, bulb cooled, ladder stable, and replacement bulb in hand, here is the actual sequence to follow:
- Remove any glass shade or cover if the fixture has one — most unscrew counterclockwise or have small retaining screws at the base
- For screw-type bulbs, turn counterclockwise until the bulb comes free; for bayonet types, push gently inward, turn counterclockwise a quarter turn, then pull straight out
- Inspect the socket briefly — look for any discoloration, burn marks, or corrosion; if you see these, stop and call a licensed electrician rather than continuing
- Insert the new bulb: screw types go clockwise until snug but not overtightened; bayonet types insert straight, press in, and turn clockwise until they click into place
- Replace the shade or cover, restore power at the breaker, and test
Overtightening a screw-base bulb is a surprisingly common problem. It makes future removal much harder and can crack the base, creating a hazardous situation where the glass separates from the metal contact. Finger-tight with a gentle final turn is all that is needed.
Disposing of Old Bulbs the Right Way
Standard LED bulbs can generally go into regular household waste in many regions, though checking local regulations is always worth doing. Compact fluorescent lamps (CFLs), however, contain a small amount of mercury and must be taken to a designated recycling point — never broken or thrown into general waste bins. Halogen bulbs are not recyclable in most areas due to the way the glass is fused, and should be wrapped before disposal to prevent injury to waste handlers.
When the New Bulb Still Does Not Work
If the replacement bulb fails to light up, resist the instinct to immediately assume the bulb is defective. Run through this short checklist before anything else:
- Confirm the circuit breaker is fully switched back on
- Check that the bulb is properly seated — a slightly loose bayonet or screw base is a frequent culprit
- Try the bulb in a different working fixture to test whether the bulb itself is the issue
- Inspect the small metal contact tab at the bottom of the socket — it sometimes gets pressed flat and loses contact with the bulb; with power off, you can gently lift it with a non-conductive tool like a wooden toothpick
If none of these steps resolve the issue and the socket itself appears damaged or shows signs of burning, the right call is always a qualified electrician. Replacing a bulb is firmly within DIY territory; diagnosing wiring faults is not.
Small Task, Real Safety Impact
What makes this task worth doing carefully is not its complexity — it genuinely is straightforward — but the fact that shortcuts are so tempting precisely because it seems trivial. Skipping the breaker step, rushing while the bulb is still hot, using an unstable surface to reach the ceiling: each one is a minor decision that occasionally leads to a serious outcome. Taking two extra minutes to do it properly costs nothing and pays back consistently. Good lighting habits start with simple ones like this.