Most people assume a blurry laptop camera means it’s time for a replacement — but in the majority of cases, knowing how to fix a blurry laptop camera takes less than ten minutes and zero technical background. The problem is almost always simpler than it looks, and this guide will walk you through every realistic cause and its solution.
Start with the obvious: the physical lens
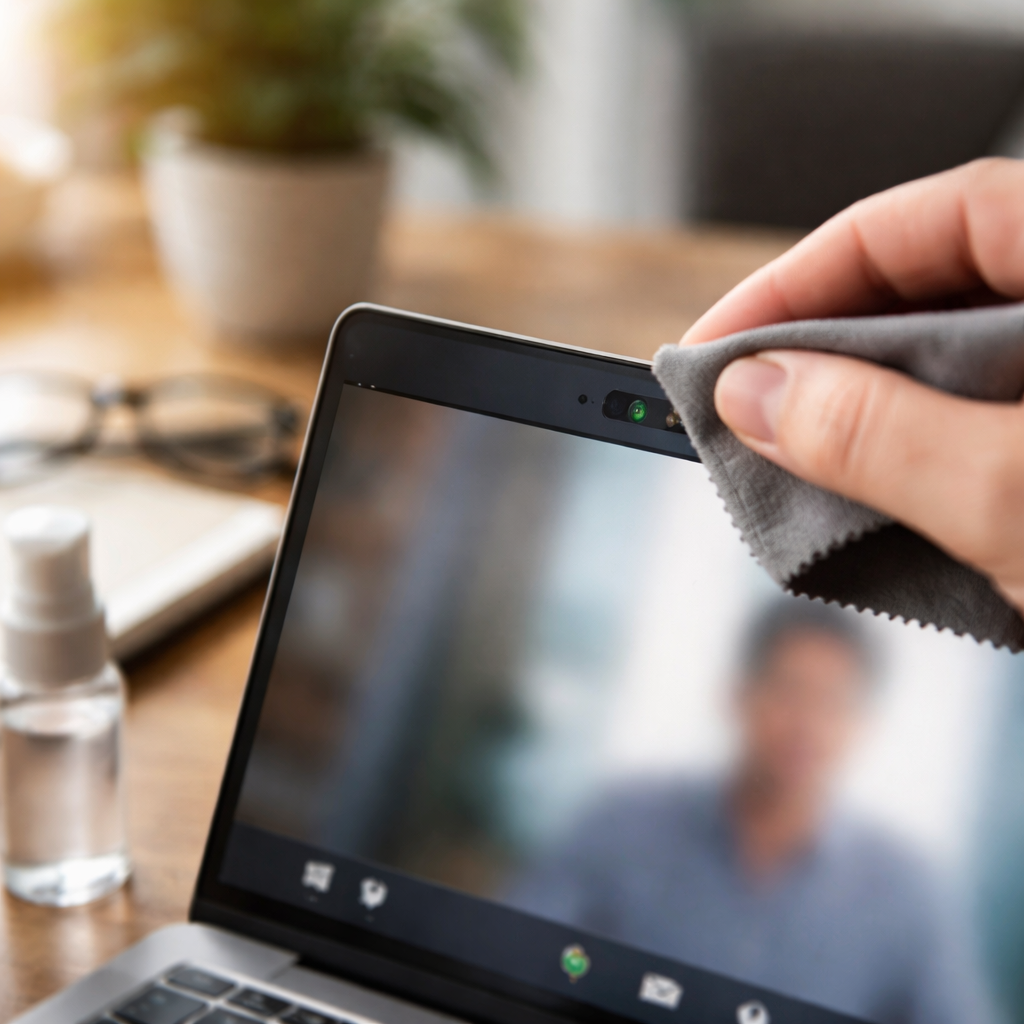
Laptop cameras sit right at the top edge of the screen, which makes them a magnet for fingerprints, dust, and skin oils. Before touching any settings, grab a clean microfiber cloth and gently wipe the tiny lens. It sounds almost too simple, but this single step resolves blurry video quality complaints more often than any software tweak.
If a dry cloth doesn’t do the job, slightly dampen it with distilled water — never use alcohol-based cleaners directly on the lens, as they can damage the coating over time. Circular motions work better than wiping back and forth.
Check your camera app and system settings
Once the lens is clean, the next place to look is your operating system’s camera configuration. On Windows, open the Camera app, click the settings gear icon, and review the resolution and brightness settings. On macOS, most camera parameters are controlled through whichever application is accessing the camera — FaceTime, Zoom, or others.
A few things worth checking in your camera or video call settings:
- Video resolution — make sure it’s set to the highest option available for your device
- Auto-focus settings — some apps allow you to toggle autofocus on or off
- Low-light enhancement or noise reduction — these can sometimes introduce blur as a side effect
- Background blur feature — many video apps now apply artificial background blur that can bleed onto faces if miscalibrated
Driver issues: the invisible culprit
Outdated or corrupted webcam drivers are one of the most common yet overlooked reasons for poor image sharpness. The camera hardware itself may be perfectly functional, but if the software layer between the hardware and your operating system is outdated, the output quality will suffer.
A driver acts as a translator between your hardware and your operating system. When that translator is out of date, the conversation gets garbled — and your camera image pays the price.
To update your webcam driver on Windows, open Device Manager, expand the Imaging Devices or Cameras section, right-click your webcam, and select Update driver. You can choose to search automatically or visit your laptop manufacturer’s website to download the latest version directly. On macOS, camera drivers are bundled with system updates, so keeping your OS current is usually sufficient.
Lighting conditions matter more than people think
A laptop camera with a small sensor struggles in low-light environments. When there isn’t enough light, the camera compensates by reducing shutter speed or boosting digital gain — both of which introduce motion blur or digital noise that looks like blurriness.
| Lighting situation | Effect on image | What to do |
|---|---|---|
| Bright window behind you | Face appears dark and blurry | Move the light source in front of you |
| Dim room, no direct light | Grainy, blurry image with noise | Add a desk lamp facing your face |
| Fluorescent overhead light only | Flat image, slight blur | Add a warm-toned secondary light |
| Natural daylight from the side | Uneven sharpness | Reposition so light hits evenly |
Repositioning yourself relative to a light source costs nothing and can immediately transform how sharp you appear on camera. Face a window or a lamp rather than having it behind you.
Third-party software that can sharpen webcam output
If hardware and system settings have been addressed and the image is still soft, dedicated webcam enhancement tools are worth considering. Applications like OBS Studio, ManyCam, or your laptop manufacturer’s own camera utility often provide manual controls for sharpness, contrast, and saturation that the default camera app doesn’t expose.
Within OBS, for example, you can add a Video Capture Device source and apply filters including sharpness adjustment directly to the camera feed. This is particularly useful for video calls or streaming where image quality matters.
Tip: If you use Zoom, go to Settings → Video → and check “HD” as well as “Touch up my appearance” — but keep the latter at a low intensity, since higher values can actually soften facial detail and make you look blurry.
When the problem is hardware-deep
There are situations where no software fix will help. Physical damage to the lens — a crack, a scratch, or a dislodged focus element — results in persistent blur that cleaning and driver updates cannot resolve. Similarly, if the camera module has partially failed due to age or impact, the image will remain degraded.
To determine whether you’re dealing with a hardware fault, test the camera across multiple applications. If every app produces the same blurry result after you’ve cleaned the lens and updated drivers, the module itself is likely the issue.
In that case, your options are:
- Contact the laptop manufacturer if the device is still under warranty
- Visit an authorized repair center for a camera module replacement
- Use an external USB webcam as a practical and often affordable alternative
External webcams, even budget-friendly ones, typically outperform built-in laptop cameras significantly in terms of sharpness and low-light performance — so this workaround often turns into a permanent upgrade.
A quick checklist before you give up on your camera
Before concluding that something is broken beyond repair, run through this sequence. It covers the full range of common causes and takes under fifteen minutes total.
- Wipe the physical lens with a clean microfiber cloth
- Restart the laptop and reopen the camera application
- Check and update the webcam driver through Device Manager or system update
- Adjust the lighting in your environment so it faces you rather than sitting behind you
- Review video settings inside your camera app or video call software
- Test across two or three different apps to isolate whether the issue is software-specific
- If nothing works, test with an external USB webcam to confirm whether the built-in module is faulty
In most cases, the issue is resolved somewhere in the first three steps. The remaining ones exist for cases where the problem runs deeper — but even then, the solutions are straightforward and don’t require advanced technical knowledge. A clearer camera image is almost always within reach.