A slightly wobbly outlet might seem like a minor annoyance, but knowing how to fix a loose electrical outlet is one of those practical home skills that can prevent real safety hazards down the line — from arcing and overheating to actual fire risks. The good news is that in most cases, this is a straightforward repair that doesn’t require an electrician.
Why outlets become loose in the first place
Before grabbing a screwdriver, it helps to understand what’s actually going on inside the wall. Outlets don’t just randomly wiggle out of position — there are a few common reasons this happens.
The most frequent cause is a gap between the electrical box and the finished wall surface. When drywall is installed, the box sometimes ends up sitting too far back, leaving the outlet with nothing solid to press against. Over time, the constant pressure of plugging and unplugging cords makes the problem worse. In older homes, you might also find that the original mounting ears on the outlet have simply worn out or that the screws have worked themselves loose from years of use.
What you’ll need before you start
This repair requires minimal tools, most of which you probably already have at home. Having everything ready before you begin saves time and keeps the job clean.
- Flathead and Phillips screwdrivers
- Voltage tester (non-contact type is safest)
- Outlet shims or spacers (available at any hardware store)
- Replacement outlet if the existing one is damaged
- Electrical tape
- Needle-nose pliers
Never work on an outlet without first turning off the circuit breaker that controls it. Use a voltage tester to confirm there is no power before touching any wiring — this step is non-negotiable.
Step-by-step: fixing a loose outlet
The actual repair process moves quickly once the power is off. Work carefully and methodically, and don’t rush the reassembly at the end.
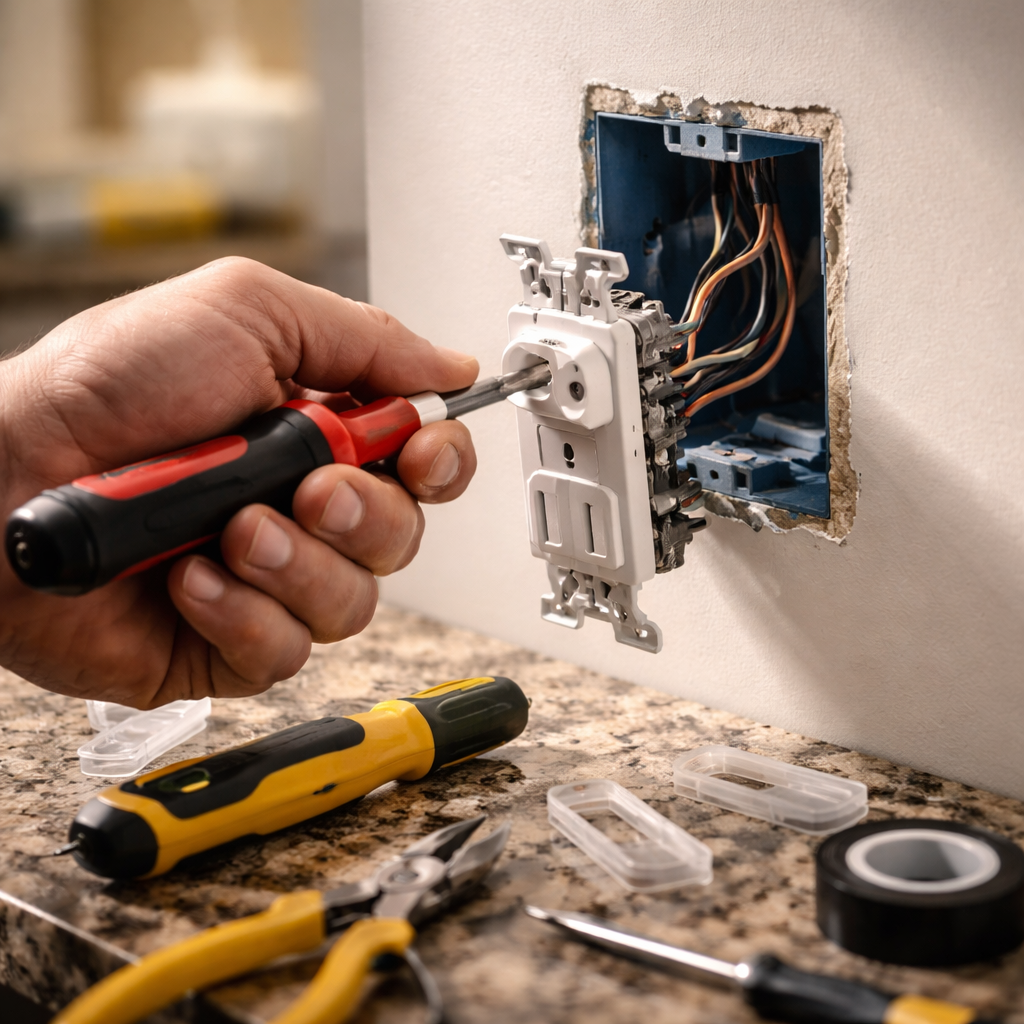
Start by switching off the correct breaker and verifying with your voltage tester that the outlet is dead. Remove the cover plate by unscrewing the single center screw. You’ll now see two longer screws holding the outlet itself to the electrical box — these are the mounting screws. Loosen them slightly and check how much play the outlet has. If it rocks noticeably, you’ve found your problem.
If the box is recessed, outlet shims are the cleanest solution. These are small plastic spacers that slide onto the mounting screws and fill the gap between the outlet’s ears and the box. Add shims one at a time, tightening the screws after each addition until the outlet sits flush and firm. Avoid over-tightening, which can crack the outlet body or strip the screw threads.
If the screws themselves were simply loose, tightening them back down may be all that’s needed. Check that the outlet doesn’t move at all before putting the cover plate back on.
When the outlet itself needs to be replaced
Sometimes the issue isn’t the mounting — it’s the outlet’s internal contact points. If plugs fall out easily even after the outlet is secured, the internal receptacle blades have likely lost their grip. This is especially common in high-use locations like kitchens or home offices.
| Sign | Likely cause | Action needed |
|---|---|---|
| Outlet rocks in the wall | Recessed box or loose screws | Add shims or retighten screws |
| Plugs slide out on their own | Worn internal contacts | Replace the outlet |
| Outlet feels warm to the touch | Loose wire connection | Inspect wiring, call electrician if unsure |
| Cover plate won’t sit flat | Box too far back | Use an outlet extender or shims |
Replacing an outlet is almost as simple as tightening one. Take a photo of the existing wiring before disconnecting anything — this gives you a clear reference when connecting the new outlet. Match the wire colors exactly: black to the brass-colored screw, white to the silver screw, and bare copper or green to the green ground screw. Wrap the screws with electrical tape after connecting, slide the outlet back into the box, and secure it with the mounting screws.
Tips that make the job easier and safer
A few small habits separate a clean, safe repair from one that causes problems later.
- Always test the outlet with a lamp or phone charger after restoring power — before putting furniture back in place.
- If you find any wires that are scorched, brittle, or have melted insulation, stop and call a licensed electrician immediately.
- Use only outlets rated for the amperage of your circuit — most standard household circuits are 15A or 20A, and the outlet should match.
- In bathrooms, kitchens, and outdoor locations, replace standard outlets with GFCI (ground fault circuit interrupter) outlets for added protection.
- If your home was built before the 1970s, have an electrician inspect the wiring before doing any outlet work yourself.
One last thing worth checking
Once everything is back together and power is restored, spend thirty seconds testing the outlet from multiple angles. Plug something in and give the cord a gentle tug to the side — if the outlet moves even slightly, go back and add another shim. A properly installed outlet should feel completely solid, with zero movement in any direction.
Loose outlets are one of those home issues that are easy to ignore but genuinely worth fixing promptly. The repair takes under thirty minutes, costs almost nothing, and eliminates a real source of electrical risk. Once you’ve done it once, you’ll wonder why you put it off.