That low hum, rhythmic clicking, or wobble you keep ignoring every time you switch on the fan? It’s rarely a sign that something is beyond repair. Knowing how to fix a noisy ceiling fan is one of those genuinely useful home skills that saves you money, frustration, and that nagging soundtrack of mechanical unhappiness every evening.
Why ceiling fans get noisy in the first place
Before reaching for a screwdriver, it helps to understand what’s actually causing the noise. Ceiling fans make different sounds for different reasons, and misidentifying the source is the most common mistake people make. A clicking sound is almost never the same problem as a humming sound, even though both are equally annoying.
The most frequent culprits include loose screws and hardware, unbalanced blades, worn-out blade brackets (called blade irons or blade arms), a dirty or dry motor, and electrical issues with the dimmer switch or speed controller. Each of these produces a distinct type of noise and requires a different fix.
Matching the noise to the problem
| Type of noise | Most likely cause |
|---|---|
| Clicking or ticking | Loose blade screws or a blade touching a light kit wire |
| Wobbling with thud | Unbalanced or warped blades |
| Humming or buzzing | Incompatible dimmer switch or motor issue |
| Rattling | Loose canopy, screws, or light globe |
| Scraping | Worn motor bearings or debris inside the housing |
Spend two minutes just listening carefully while the fan is running at different speeds. That alone will narrow down your diagnosis significantly before you touch anything.
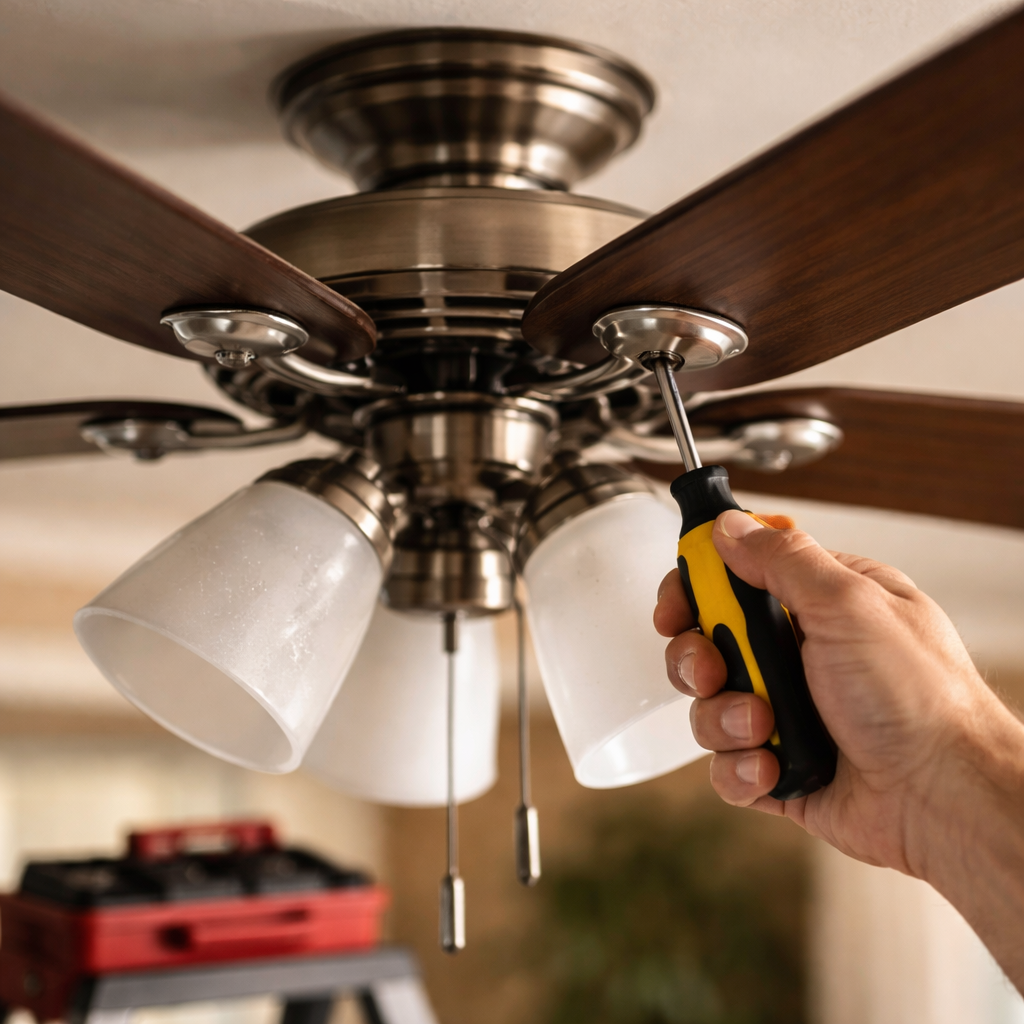
Step-by-step: tightening loose hardware
This is where most repairs begin, and for good reason — loose screws are responsible for a surprising number of noise complaints. Turn the fan off, wait for the blades to stop, and work through the following sequence:
- Check all screws connecting each blade to its blade arm. These loosen gradually from vibration over time.
- Check the screws holding each blade arm to the motor housing.
- Tighten the canopy screws where the fan mounts to the ceiling bracket.
- If the fan has a light kit, check the screws on the globe holders and the connection points between the light kit and the motor.
Use a screwdriver rather than power tools here — overtightening can crack the blade arms or strip the screw holes, which creates a new problem entirely.
Balancing the blades: the fix people overlook
An unbalanced ceiling fan wobbles, and wobbling creates noise. It also accelerates wear on the motor. Blade warping is more common than people realise, especially in rooms with high humidity or temperature fluctuations.
Most ceiling fans come with a balancing kit — a small plastic clip and adhesive weights. If yours didn’t include one, they’re inexpensive and widely available. The process works like this: attach the clip to the trailing edge of one blade at the midpoint, run the fan, and observe whether the wobble improves. Move the clip across each blade in turn until you find the one making the biggest difference, then position the clip along that blade’s length to fine-tune the balance before sticking on a permanent weight.
Blade warping is often invisible to the naked eye. Use a ruler or measuring tape to check that all blades sit at the same height relative to the motor housing — even a few millimetres of difference can cause noticeable wobble.
Dealing with humming: the dimmer switch problem
A humming ceiling fan is a particularly common complaint, and the cause is often not the fan itself. Many homeowners install ceiling fans on circuits controlled by standard light dimmer switches. The problem is that most ceiling fans are not designed to work with dimmers — the incompatibility creates an audible electrical hum that no amount of tightening will fix.
The solution is straightforward: replace the dimmer with a standard on/off switch, or if you want speed control, use a switch specifically rated for ceiling fans. These are sold separately from light dimmers and are designed to handle the fan’s motor load without interference.
Lubricating the motor: when and how
Older ceiling fan models — particularly those made before sealed motor designs became standard — have oil ports that need occasional lubrication. A dry motor produces a grinding or scraping sound that gets worse over time and can eventually lead to motor failure.
To check whether your fan has an oil port, look for a small hole on top of the motor housing, usually marked with the word “oil.” If it’s present, add a few drops of non-detergent electric motor oil (SAE 10 or SAE 20, depending on the manufacturer’s recommendation). Never use WD-40 or general-purpose lubricants — these can damage the motor windings.
A quick checklist before you call a professional
- All blade screws checked and tightened
- Blades balanced using a balancing kit
- Canopy and mounting bracket secure
- Light kit screws and globes checked
- Dimmer switch replaced with a fan-rated switch
- Motor oil port checked and lubricated if applicable
- No wires are touching or catching on moving parts
If you’ve worked through this list and the noise persists, it may indicate a motor bearing failure or an issue with the internal wiring — at which point a licensed electrician is the right call rather than further DIY investigation.
When a quiet fan is worth more than a fixed one
Sometimes the honest answer is that a very old fan with worn bearings and degraded blade arms will cost more to repair professionally than it’s worth. Modern ceiling fans with DC motors are significantly quieter than older AC motor models, more energy-efficient, and often come with remote controls and reversible airflow for seasonal use. If your fan is more than ten to fifteen years old and you’ve addressed all the basic fixes without success, replacing it is a reasonable and practical choice rather than a defeat.
That said, for the vast majority of noisy ceiling fans, the fix is simpler than it looks — a few tightened screws, a balanced blade, or a swapped switch. The satisfaction of running a fan that finally operates in silence is entirely worth the hour or so it takes to work through the process properly.