Most people notice a dark patch on the wall and reach for a cloth — only to find it’s back within weeks. That’s because surface cleaning alone doesn’t solve the actual problem behind mold growth. If you genuinely want to know how to get rid of mold on walls for good, the answer involves understanding what’s feeding it, not just what’s covering it.
Why mold keeps coming back
Mold is not a stain. It’s a living organism that needs three things to survive: moisture, a surface to feed on, and relatively warm temperatures. Walls — especially in bathrooms, kitchens, and poorly ventilated rooms — provide all three. Painted drywall, plaster, and even concrete can harbor mold colonies if condensation is a regular occurrence.
Before grabbing any cleaning product, it’s worth asking: where is the moisture actually coming from? A leaking pipe behind the wall, inadequate insulation that causes condensation, or a bathroom with no working extractor fan — these are the root causes. Cleaning the visible mold without addressing the source is like mopping the floor while the tap is still running.
Identifying what you’re dealing with
Not all wall mold looks the same, and the appearance can give you useful clues about the severity of the issue.
- Black or dark green patches with a fuzzy texture often indicate Cladosporium or Aspergillus species — common in damp indoor environments.
- White or grey powdery growth on brick or concrete walls is frequently efflorescence (mineral deposits) rather than mold, though mold can appear alongside it.
- Pink or orange streaks in shower grout are typically bacteria, not mold — though they signal the same underlying moisture problem.
- A persistent musty smell with no visible growth may mean mold is developing behind the wall surface or under paint.
If the affected area is larger than roughly one square meter, or if you suspect mold is present inside the wall cavity, consulting a certified remediation specialist is the safer path. Disturbing large mold colonies without proper containment can spread spores throughout the room.
Practical cleaning methods that actually work
For manageable surface mold on painted or tiled walls, several approaches have solid evidence behind them. The key is choosing the right method for the specific surface material.
| Surface type | Recommended solution | What to avoid |
|---|---|---|
| Painted drywall | White vinegar (undiluted) or diluted hydrogen peroxide (3%) | Bleach — it can damage the surface and doesn’t penetrate porous materials |
| Bathroom tiles and grout | Baking soda paste or commercial antifungal spray | Abrasive scrubbers that damage grout sealing |
| Unpainted brick or concrete | Diluted bleach solution (1 part bleach to 10 parts water) | Vinegar — ineffective on non-porous mineral surfaces |
| Wallpaper | Specialist mold removal spray, tested in a small area first | Excessive moisture during cleaning — it worsens penetration |
A common misconception is that bleach is the universal solution for mold removal. On non-porous surfaces like glass or ceramic tiles, it works well. On porous materials such as drywall or plaster, bleach’s water content can actually drive moisture deeper into the wall, while the bleach itself stays on the surface — leaving the mold roots untouched.
White vinegar at full concentration kills around 82% of known mold species according to studies on antifungal agents, and it penetrates porous surfaces more effectively than bleach — making it a better choice for most interior walls.
Step-by-step: cleaning mold from a painted wall safely
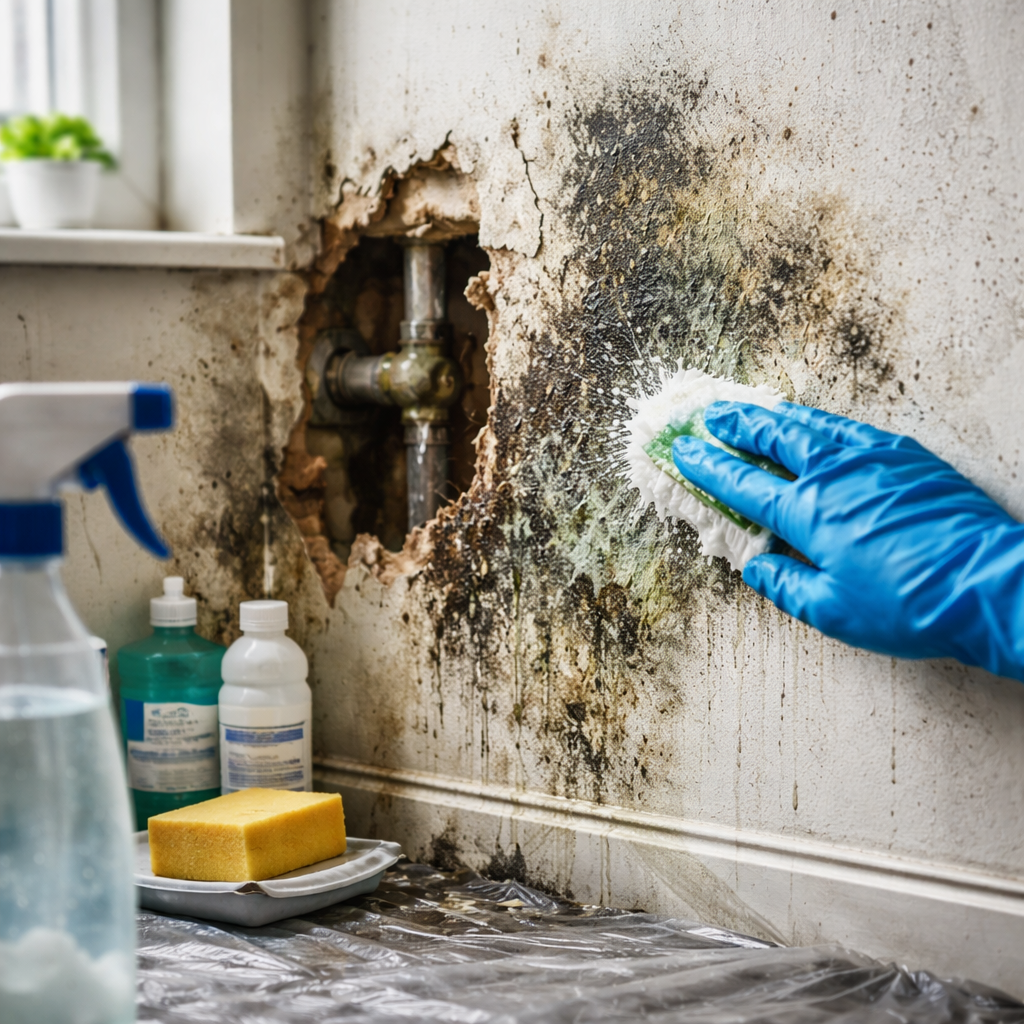
Here’s a straightforward process for tackling a small-to-medium mold patch on an interior painted wall. This applies to surface mold — not cases where growth has reached the underlying structure.
- Protect yourself first. Put on rubber gloves, an N95 or FFP2 respirator mask, and safety glasses. Open windows before you start.
- Don’t dry-brush the mold. This releases spores into the air. Instead, lightly mist the area with your chosen solution before touching it.
- Apply white vinegar or a 3% hydrogen peroxide solution with a spray bottle. Let it sit for at least 10 minutes.
- Scrub gently with a stiff-bristled brush or an old toothbrush for grout lines. Work from the outer edge of the patch inward to avoid spreading.
- Wipe away residue with a damp cloth, then dry the area thoroughly with a clean towel.
- Apply a second treatment and allow to air dry completely before considering repainting.
- If repainting, use a mold-resistant primer before applying the topcoat. Standard emulsion alone will not prevent regrowth.
Stopping mold before it starts again
Cleaning is only half the job. Without changes to the room’s environment, mold colonies will re-establish — often faster the second time, because the spores are already present in the air and on nearby surfaces.
Ventilation is the single most effective long-term prevention tool. In bathrooms and kitchens, extractor fans should run during and for at least 15–20 minutes after any steam-producing activity. In bedrooms where condensation forms on windows overnight, leaving a small gap at the top of the window or using a passive wall vent can make a measurable difference.
Keeping indoor relative humidity below 60% is the benchmark most environmental health guidance points to. A basic hygrometer — widely available and inexpensive — takes the guesswork out of monitoring this. If the reading consistently sits above 65%, a dehumidifier is worth considering as a longer-term investment rather than a one-time fix.
Furniture placement also plays a quiet role. Wardrobes or large pieces of furniture pushed directly against external walls restrict airflow and create cold, still pockets where condensation collects. Leaving a 5–10 cm gap between furniture and exterior walls is a small change that reduces moisture buildup significantly.
When the wall itself needs to go
There are situations where surface cleaning is genuinely not enough. If mold has penetrated deeply into drywall or plaster — visible as discoloration that doesn’t lift with treatment, or as soft, crumbling material — the affected section typically needs to be cut out and replaced. This is not a cosmetic decision; it’s a structural and health one.
Signs that a wall section should be replaced rather than cleaned:
- The wall feels soft or spongy when pressed
- Mold returns within days of cleaning
- There is a persistent damp or musty smell even after the surface appears clean
- Paint is bubbling or peeling repeatedly in the same area
- You can see or smell mold on the other side of the wall (inside a cupboard, for instance)
In rented properties, any mold caused by structural dampness — rising damp, roof leaks, or failed cavity wall insulation — is typically the landlord’s legal responsibility to address. Documenting the issue with photographs and written communication is important in those situations.
The part most guides skip
Managing mold on walls is not a once-and-done task for most homes — it’s an ongoing part of maintaining a healthy indoor environment. The combination of surface treatment, improved ventilation, and regular monitoring creates conditions where mold struggles to get a foothold. None of these steps are complicated or expensive, but they do require consistency.
If you’ve treated the same patch three or more times with no lasting result, that’s useful information: it means the moisture source hasn’t been resolved, and the focus needs to shift from the wall to the building itself. A damp survey carried out by a qualified professional can identify hidden leaks, insulation failures, or rising damp that no amount of cleaning will overcome on its own.
Mold-free walls are achievable — but only when the conditions that invite mold in the first place are taken seriously alongside the cleaning itself.