Most gardeners who try to grow tomatoes from seeds for the first time are surprised by how manageable the process actually is — the real challenge isn’t germination, it’s understanding the timing and conditions that make seedlings thrive rather than just survive.
Why starting from seed makes sense
Buying transplants from a garden center is convenient, but it limits you to whatever varieties happen to be stocked locally. Starting from seed opens up access to hundreds of heirloom, hybrid, and specialty varieties — from deeply flavored beefsteaks to tiny currant tomatoes — that you’d never find as ready-to-plant seedlings. There’s also a practical cost advantage: a single seed packet typically contains 20–50 seeds and costs a fraction of what you’d spend on individual transplants.
Getting the timing right before anything else
Timing is the single most common mistake beginners make. Tomato seedlings started too early become leggy and root-bound long before outdoor conditions are safe for transplanting. The standard guideline is to sow seeds indoors 6 to 8 weeks before your last expected frost date. If you’re in a region where the last frost typically falls in mid-May, that means starting seeds in late March or early April.
If you’re unsure of your local frost dates, agricultural extension services and national meteorological agencies publish this data by region and it’s freely available online.
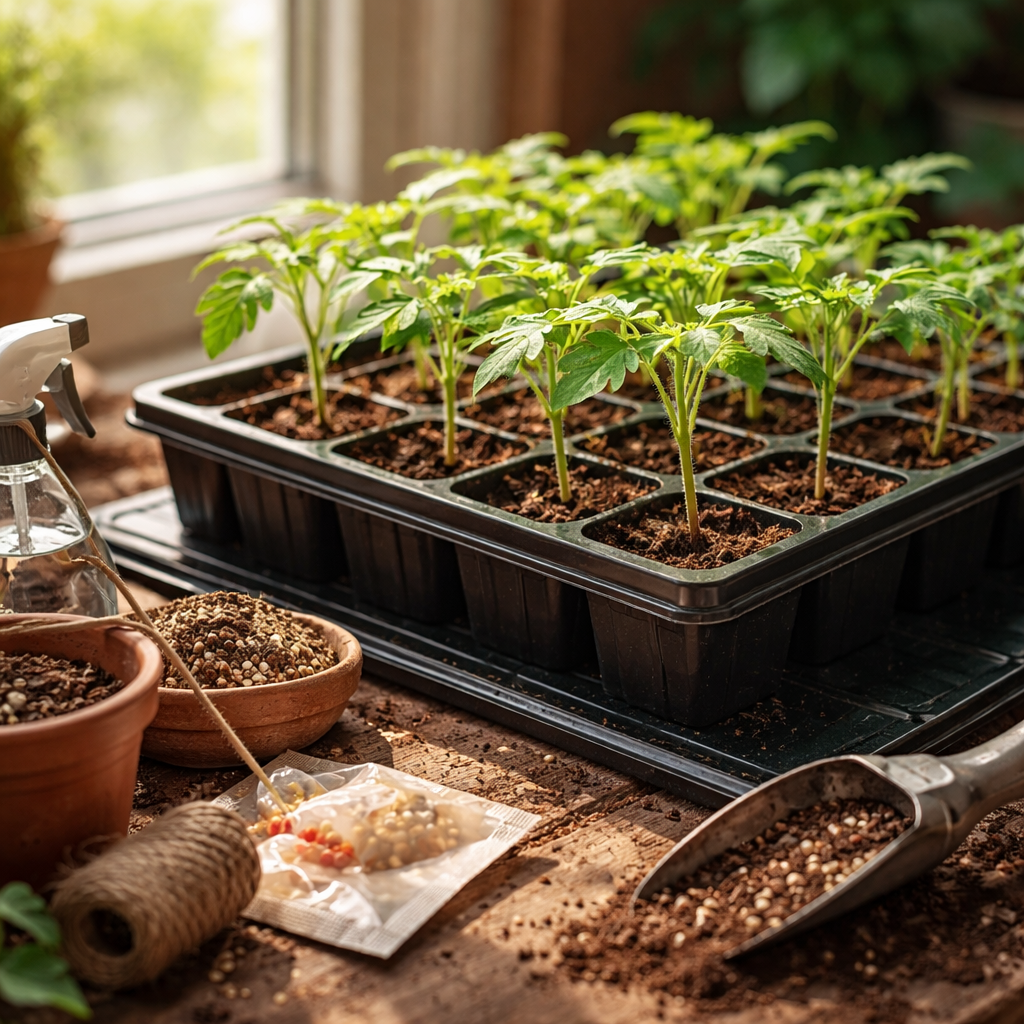
What you actually need to get started
You don’t need a greenhouse or specialized equipment. A sunny windowsill, a few basic supplies, and consistent attention will get you a long way.
- Seed-starting mix (not regular potting soil — it’s too dense and can cause damping off)
- Small cells, trays, or recycled containers with drainage holes
- A clear humidity dome or plastic wrap to retain moisture during germination
- A heat mat (optional but noticeably improves germination rates)
- A grow light or a south-facing window with at least 6 hours of direct light
- A spray bottle for gentle watering
One thing worth noting: tomato seeds do not require light to germinate — they need warmth. Soil temperature between 21°C and 27°C (70–80°F) is ideal. Once the seedlings emerge, however, light becomes critical.
Sowing, germination, and those first true leaves
Fill your containers with moistened seed-starting mix and sow seeds about 6mm (¼ inch) deep. Cover lightly, place the humidity dome on top, and set in a warm location. Under good conditions, tomato seeds typically germinate within 5 to 10 days.
The first pair of leaves you’ll see are cotyledons — seed leaves that are part of the embryo. They look nothing like mature tomato foliage. Don’t be alarmed. Wait for the first true leaves to appear before making any major decisions about potting up or fertilizing.
Once cotyledons are fully open and the seedling stands upright, remove the humidity dome immediately. Keeping it on too long invites fungal problems, particularly damping off — a soil-borne disease that collapses seedlings at the stem base practically overnight.
Light, water, and the seedling care routine
Inadequate light is responsible for more failed seedlings than almost any other factor. A windowsill, even a bright south-facing one, often doesn’t deliver enough intensity during early spring months. A basic LED grow light positioned 5–8 cm above the seedlings, run for 14–16 hours per day, makes a dramatic difference in stem thickness and overall vigor.
Watering should be consistent but never excessive. The goal is evenly moist soil — not wet, not dry. Bottom watering (setting trays in shallow water and allowing the mix to absorb moisture from below) encourages deeper root development and keeps foliage dry, which reduces disease risk.
| Seedling stage | Key care priority | Common mistake to avoid |
|---|---|---|
| Germination (days 1–10) | Warmth and consistent moisture | Letting the mix dry out completely |
| Cotyledons open (days 7–14) | Remove dome, introduce light | Keeping humidity dome on too long |
| First true leaves (weeks 2–3) | Begin light fertilizing | Over-fertilizing with high nitrogen |
| Potting up (weeks 3–5) | Move to larger containers | Disturbing roots unnecessarily |
Potting up and feeding your tomato seedlings
Once true leaves are established and roots begin to show at the drainage holes, it’s time to pot up into a larger container — typically a 10 cm (4-inch) pot filled with quality potting mix. Tomatoes are unusual in that they can form roots along any buried portion of their stem, so planting them deeper than they were previously is actively beneficial. Bury the stem up to the lowest set of leaves.
Start feeding with a balanced, diluted liquid fertilizer once a week after the first true leaves appear. At this stage, you want balanced nutrition — not a high-nitrogen formula, which pushes lush leafy growth at the expense of root development.
Hardening off — the step people skip and later regret
Indoor-grown seedlings are essentially raised in a protected environment with stable temperatures, no wind, and artificial light. Placing them directly into a garden bed is a shock the plant may not recover from. Hardening off is the gradual acclimatization process that prevents transplant stress.
Start by placing seedlings outdoors in a sheltered, partially shaded spot for 1–2 hours on the first day. Increase outdoor exposure by an hour or two each subsequent day over the course of one to two weeks. By the end of that period, plants should be able to handle full sun and normal outdoor temperatures without wilting or leaf scorch.
Watch for wind exposure during hardening off — gentle breeze is actually beneficial as it strengthens stems, but strong gusts can snap fragile seedlings at the base.
From seedling to garden bed
Transplant into the garden only after all frost risk has passed and nighttime temperatures remain consistently above 10°C (50°F). Tomatoes are sensitive to cold soil — growth stalls, and plants become more susceptible to disease if set out too early. Choose a location with full sun (at least 6–8 hours of direct sunlight daily), good drainage, and ideally where tomatoes or other nightshade family crops haven’t grown in the past two or three seasons to reduce soilborne disease pressure.
Plant deeply, water thoroughly, and support stems with stakes or cages from the beginning — it’s far easier than trying to install support once the plant has grown into itself. The weeks between transplanting and first flower set are when consistent watering matters most, since irregular moisture at this stage is a leading cause of blossom end rot later in the season.
What you end up with after all of this is a plant you understand from the roots up — quite literally. There’s a specific kind of satisfaction in eating a tomato you germinated yourself, and the practical knowledge you gain in the process tends to make every subsequent growing season noticeably easier.